Thirty years later and a renewed interest in model making, I set about correcting the mistakes I had made in my early model making. Doing a search on eBay I quickly found a kit for sale from Germany. I quickly bought it for US$80 using the Buy it Now option on 15 August 2002. I had to pay another US$35 for postage which is quite expensive from Germany. The kit arrived on 2 September. After a couple of months, I started to build it. Here is information on how I built the kit. Hopefully, it will be useful to others who also would like to build this kit.
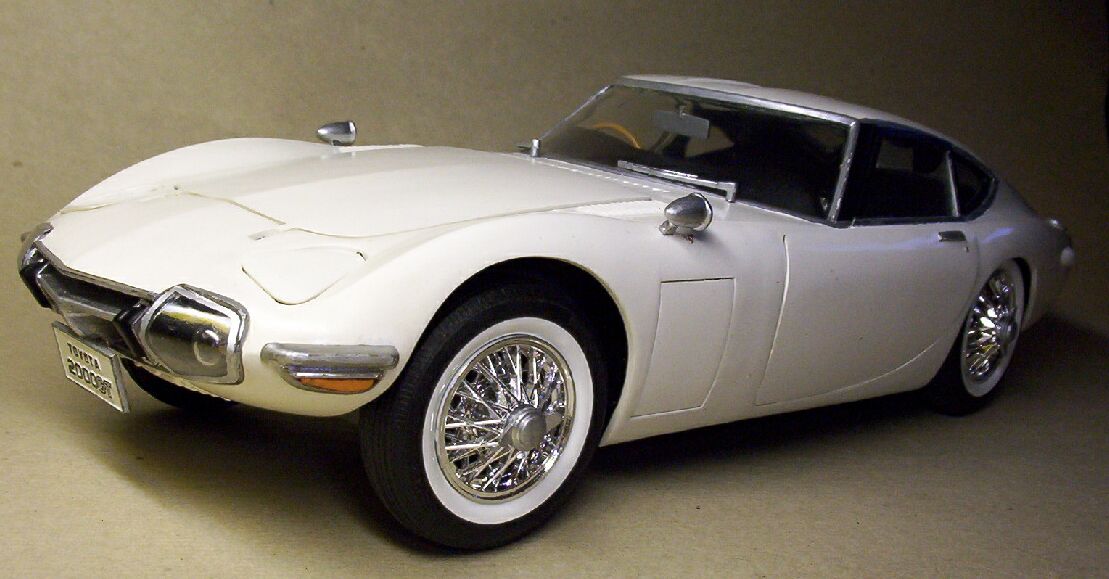
Since I only work on my models on the weekend, it took me a very long time to do this kit. I finished on 3 August 2003, about six and a half months after starting the kit. I am very pleased with the finished result, looking much more accurate than just building it straight from the box. For me, the 2000GT is a very beautiful car and it was a pleasure getting to know it by building the Otaki kit.
This is a large kit with many pieces, I counted 210. There are two sprues of black, one sprue of chrome, two sprues of white (with part of one sprue chrome), one sprue of clear, a small sprue of clear red, a white main body, various metal and rubber parts, two lights, and four rubber wheels. This appears to be the first release of the kit which did not include the RE-14 electric motor and 8 and 10 cog gears. The instructions are on a large sheet that is folded like a newspaper. A separate sheet of the instructions in English are included. There are no painting instructions.
I dechromed all the chrome parts except the spoked wheels by soaking the parts for a few minutes in pure White King bleach. After sanding and filling any imperfections, these parts look much more realistic after painting them silver. For reference I used pictures of the 2000GT I found on the net.
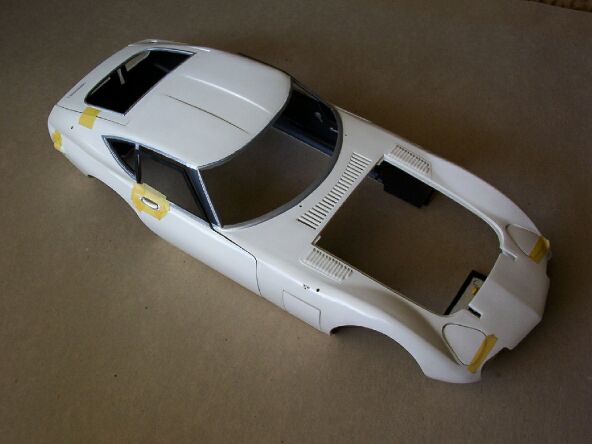
1. I first spray painted all the external body parts gloss white. To prepare the body I glued 77 and 81 to the body 90, filling any gaps with putty and sanding smooth. You can also spray paint the tyre white walls 109. To prepare the doors you should glue the door handles 89 to the doors 62,63. Fill the gaps around the door handle and sand smooth. You should also slice off the key hole in the two side panel doors 54. Save these sliced off parts, as you will need them for the doors later on. I did not notice the key hole and handle inaccuarices until after the doors were complete and on the body. So, after correcting the errors I had to mask off the doors and respray which was a lot of extra work.
I brush painted the inside of the body semi-gloss black (SGB). I masked off all the edges of the body with Tamiya masking tape (good stuff). I painted the underneath of the headlight covers 70 SGB. The headlights 68,69 were sliver. I glued the clear headlight 72 using a clear drying glue (Testors Clear Parts Cement, good stuff).
3. Using a small brush, I painted the Toyota 2000GT badge on the back door 58 silver. I masked off the area around the badge first.
4. I did not glue the clear the parts, saving them until after the body was finished.
7. I had to make the holes in the doors 62,63 where the bracket attaches much larger in order for the hinge to fit. I used a small drill to do this.
8. I painted the inside doors 63 SGB and the door and window handles on 63 silver.
10. Note that there is only one battery 56. I painted the battery gloss black and the battery terminals matt red. The inside of the compartments 55 is SGB.
11. I painted the fan motor 76 and the radiator 74 gloss black, the fan 75 gloss yellow (I don't think this is correct), and the radiator cap 11 steel.
12. The wipers 93, side mirrors 87, rearview mirror 80, and indicators 85 were painted silver. The front bumpers 79 was SGB. There were some molding defects on the grille 78 which I filled in with putty. I painted the back and inside the fog lights of the grille SGB. The rest was painted silver. The number plates 94,95 were painted silver, except at the front where it was painted gloss white with the Toyota 2000GT writing in Gloss Black. I had to make a small notch on the grille in order to attach the number plate. I also put in two small pieces of plastic card to fill in the gap between the number plate and the grille. The front indicators 97 should be clear, not clear red. As a compromise, I painted them gloss orange. I did not glue the side mirrors (to avoid breaking them off while handling the body) and wipers (since the front glass had yet to be glued), leaving them until later.
13. The kit was missing the wire, so I used other wire which I painted SGB. I also painted the red globe wires SGB.
14. After masking the door handle, I painted it silver. I also painted the keyholes from before silver and glued them using clear parts cement underneath the door handles. The antenna 58, fuel cap 86, light holders 73 and bumper holders 83 were painted silver. The rear bumpers 84 were painted SGB.
|
Body after some work. |
15. I used photos of the dashboard 49 to paint it satin brown (for the wood panelling), silver and SGB where approriate. The steering wheel 51 was inaccuarate. I filled in the three spokes and narrowed them with a file. The handle was painted matt sand and then clear gloss. The spokes and steering column were painted SGB. After installing the dashboard I found the steering wheel to be too far in towards the seat and pointing down. I cut about 5 mm from the steering column and made an angle so that the steering wheel would be pointing slightly up. I scanned the radio cutout from the instructions (which are printed in green) and printed them black and white. I did not use the dial holders 50 (but save this part for later). For the instrument dials, I used a photo of the dashboard to get a more accurate image. The dashboard cover 99 was painted SGB.
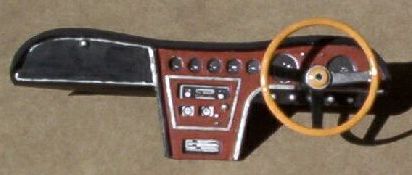 |
Dashboard. |
16. I prepared all the window glass by sanding down with finer grades of sand paper. This removes most of the irregularities in the glass. I then used Turtle was car polish to get a clear finish. Be careful where the clear plastic had come togther in the mold. You can see this as a line. If you apply too much pressure, the plastic will crack along the line. I unfortunately did this to the front glass, and now a small 8 mm crack can be seen at the top of window. Glueing the front glass 60 was the hardest. I attached the dashboard so that 99 was under the bottom edge of the front glass. I then attached the wipers 93.
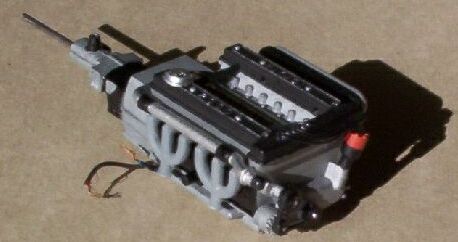
17. The 8 and 10 cog gears did not come the kit. Fortunately, I was able to get these parts from Dick Smith's (an electronic store) in their Nylon Gear Pack. I also had an RE-14 motor from one of my previous models. I used strong glue to attach the motor to the gearbox. I also routed the wires around the side of the motor to the rear of the engine. I mistakenly did this on the left side of the motor which later causes interference with the exhaust system. You should do this on the right side of the motor. I soldered all joints with a soldering iron and solder. The bottom of the gearbox is exposed. I used plastic card to cover the gears up. I had to oil the gears in order for the engine to work. I also attached the engine tray 99 at this point. The motor wires were made to come neatly out the side of the engine between the gearbox and motor.
 |
Scratch built gearbox cover. |
18. I used many photos of the engine in order to paint it accurately. The gear belt 8 is shown in the wrong position. It should be mounted horizontally, so that the alternator 12 is to the right of the engine. I used one of the main dials from 50 to make the alternator longer. I attached a small piece of plastic card to the back of the alternator. I used one of the small dials from 50 and attached it the back of the large wheel on 8 so that it could be attached to the engine. The alternator fan was painted silver with the alternator body aluminium. The fan belt was painted SGB, with the gears gloss black. The bolts on the gears were painted silver. The rest of the engine body was painted aluminium. The section between the gearbox and the bell housing was painted gloss black. The top half of the distributor 7 was painted matt red and the bottom half SGB. I had to shorten the distributor a little bit, so that it would fit under the rocker cover 4.
The carburators 9 were painted aluminium. The airintake 13 was painted SGB and the aircleaner 14 was painted light gray. The bolts were painted silver. The main body of the engine top was painted aluminium. The bolts and radiator pipe were painted silver. The radiator pipe connectors was painted SGB. There were four punch holes on the rocker cover 4 which I filled in and sanded. The rocker cover was painted matt black with the Toyota 2000 detail on top painted silver.
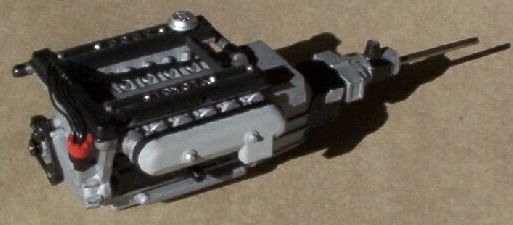 |
Left side of engine. |
19. The extractors 32 were painted dark gray. The oil lid 10 was painted silver. The oil lid has Toyota in Japanese on it.
 |
Right side of engine. |
20. The chassis 39 was sanded to remove any defects. There were two punch holes at the top of the rear suspension mounts which were filled in and sanded. The chassis was spray painted SGB. The motor and light switchs were also painted SGB. I used a soldering iron in order to melt the lugs holding the battery connectors 114,115. The chassis is in an X-shape which I painted matt light gray.
22. I used glue to hold the switch connectors 117 in place.
25. I painted all these suspension parts SGB, except the middle of axle holders 44 which I painted steel to simulate disk brakes. I had to glue 101 in place as 44 was not long enough to melt.
26. I painted all these parts SGB. Make sure to attach some plastic card to the bottom of 103. This will prevent glue from coming through the hole that is there and preventing suspension movement. I found out this by mistake. It was very difficult to remove 102 from 103 when the glue went inside.
28. I painted the differential 33 SGB. I did not paint the rubber connector 121.
31. This is where I stuffed up the first time! This time I carefully followed the instructions and used a small hammer to tap in the rods 122 into the wheels 107.
32. I painted 41,42 matt light gray. The rest is SGB.
33. Suspension rods 35,36 are matt light gray.
34. The instructions incorrectly shows both chair controls 48 being glued to the left chair 45,46. The left chair control should be attached to the left of the left chair and the right chair control should be attached to the right of right chair. I painted the chairs gloss black. I also added plastic card to the back of 47 to fill in the hole in the back of the chair. The chair controls were painted silver.
35. The firewalls 18,19 were painted SGB. The pedals 20,21 were painted SGB and steel. The console 53 was painted satin brown, sliver and SGB. The gear shift 52 was painted silver and sand. The firewalls only go half way up, and so the engine is visible from the interior. I used plastic card to build up the rest of the fire wall.
 |
Scratch built fire wall. |
36. The front suspension 16,17 was painted matt light gray. The suspensions mounts 25 were painted SGB.
37. All parts painted SGB.
38. Top suspension mounts 27 painted SGB. The inner points of the mounts were painted silver and steel in a small circle, to simulate the bolts holding the mounts in place. The rest is SGB.
39. I had to use a lot of force in order to screw in 124. The inner part of 30 was painted steel.
40. The steering arm 31 was painted SGB and the steering holder 24 was painted matt light gray.
42. One of the spinners 108 had small indentions on the front of them. Instead of leaving them chrome, I dechromed them so that I could fill in the indentation. These were painted silver. The best silver I had is my old 20 year can of Humbrol paint. The new silvers look more like aluminium than silver.
45. The botton of the bonnet 59 is incorrect. It has an X shaped pattern, instead of an upside down V. I sanded away the old pattern and used plastic card to simulate the insulation. This was painted linen matt (my old Airfix M14 which now has a very rough texture). The V was painted SGB. The bonnett linkage was painted steel. The radiator hose 126 was painted SGB. I had to cut a little slot on the engine side of the hose in order for it to fit.
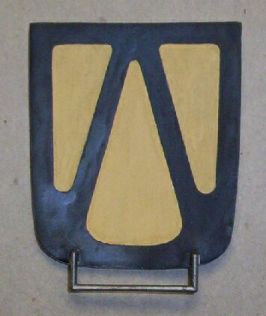 |
Corrected bonnett. |
46. The entire exhaust system was painted silver. Reference photos show this as chrome!
 |
The suspension is nicely detailed. |
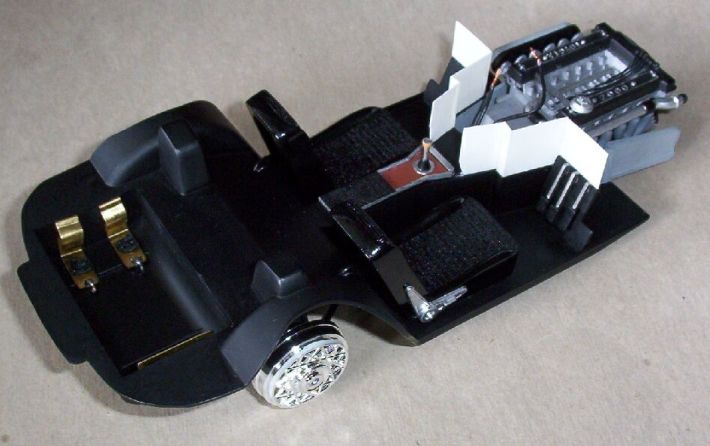
47. The battery cover (no part number) was spray painted SGB. The straps were painted gloss back and the buckles silver. I attached small bits of plastic card to extend the straps over the sides. After putting on the cover though I realised that the sides were missing! This was correctd with plastic card and after several aborted attempts at respraying the part, including the card buckling out a couple of times, this piece was finally completed. The side mirrors were then attached.
 |
Box. |
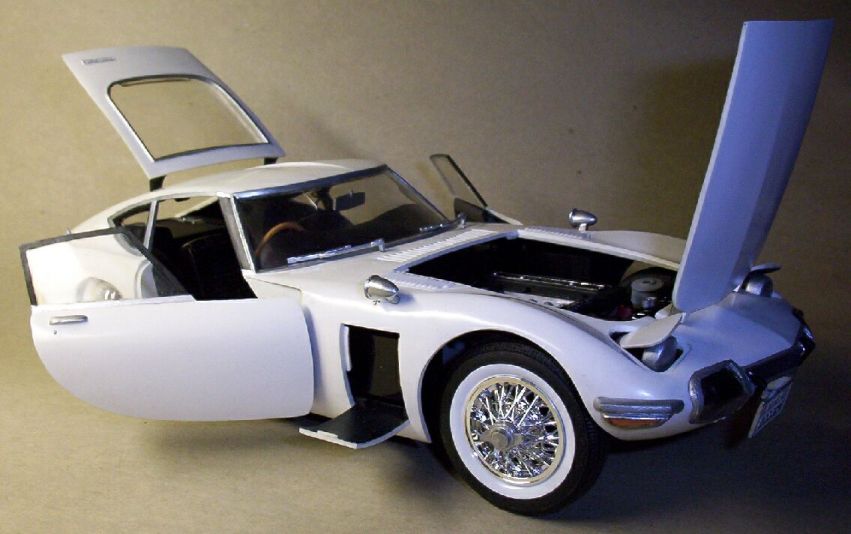 |
Side view with everything open. The lights work too! |
 |
Back view with everything open. The front wheels turn as well. |
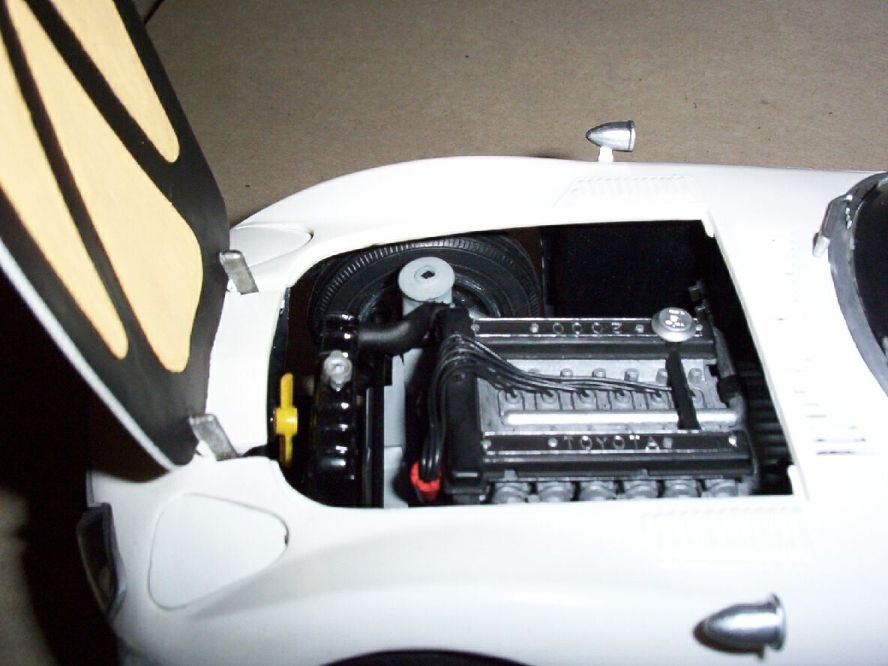 |
Engine bay. |